
This post contains affiliate links. If you purchase through our links, we may earn a small commission at no extra cost to you. See our Affiliate Disclosure for details.
A proper jumping spider enclosure is the foundation of successful spider keeping. Unlike many other pet spiders that need large, horizontal terrariums, jumping spiders are arboreal hunters that thrive in compact, vertical spaces with excellent ventilation. Whether you’re setting up for a tiny spiderling or an adult Phidippus regius, getting the enclosure right means your spider will be healthier, more active, and more fun to observe. This guide covers everything you need to know about choosing, setting up, and maintaining the perfect jumping spider enclosure.
Jumping spiders belong to the family Salticidae — the largest spider family, with over 6,000 species. According to Wikipedia’s overview of jumping spiders, these agile predators are found on every continent except Antarctica and are known for their exceptional vision and active hunting style. In the wild, they build small silk retreats in crevices, under bark, and in foliage — understanding these natural behaviors is key to creating a jumping spider enclosure that meets their instinctual needs.
The Beginner Jumping Spider Kit
If you’re setting up your first spider, this is the whole list. Nothing fancy, nothing you’ll outgrow in a month.
- EctoTherm jumping spider enclosure — front-opening, escape-proof, and sized right for an adult
- Magnetic hanging water dispenser — the one thing most beginners skip, and the one they regret skipping
- Exo Terra mini mister — a light misting beats a water bowl your spider can drown in
Best Jumping Spider Enclosure Types
Acrylic Enclosures (Best Overall)
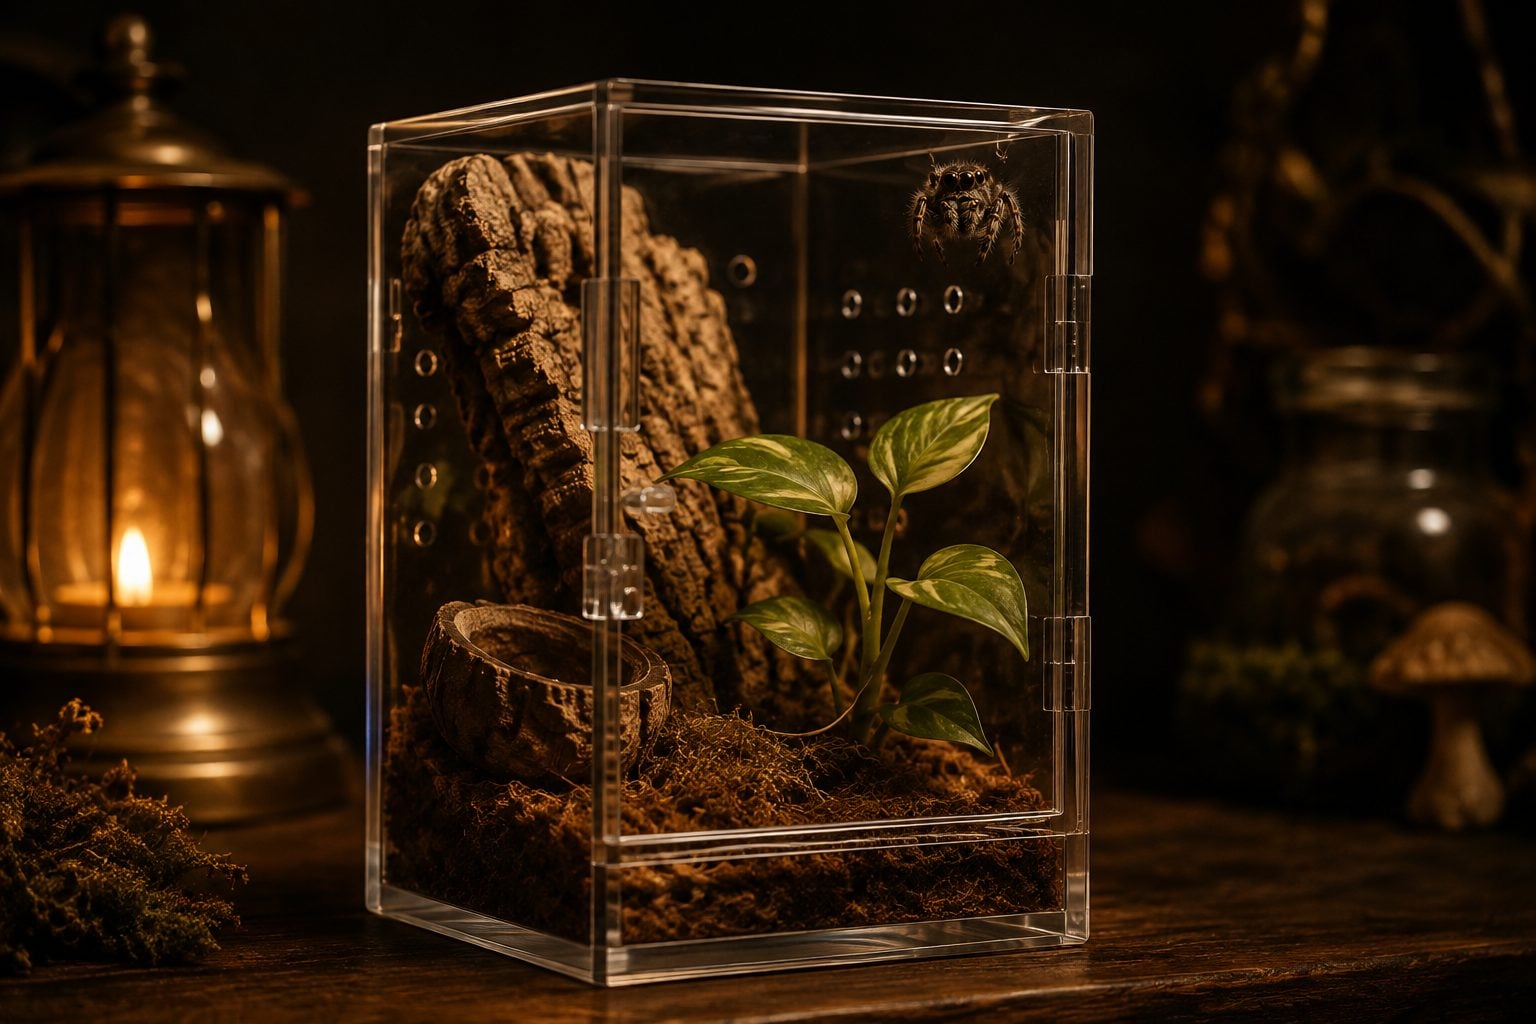
Purpose-built acrylic jumping spider enclosures are the gold standard for most keepers. Brands like Zilla Micro Habitats, AMAC boxes, and custom magnetic-lid enclosures from small businesses offer crystal-clear visibility, secure lids, and proper cross-ventilation. A 4x4x6 inch or 5x5x7 inch acrylic enclosure is perfect for most adult jumping spiders. The clear walls make it easy to observe your spider, and acrylic is lightweight, durable, and easy to clean.
Modified Deli Cups (Best for Spiderlings)
For spiderlings and small juveniles, modified deli cups make excellent temporary enclosures. A 32oz deli cup with ventilation holes poked in the lid provides adequate space for a growing spider. The small size makes it easier for tiny spiderlings to find their prey — in a large enclosure, a 2mm spider might never encounter a fruit fly. As your spider grows past the 4th instar, upgrade to a proper acrylic jumping spider enclosure.
Our top pick: The EctoTherm Jumping Spider Enclosure (Small) is purpose-built for jumping spiders — front-opening door, escape-proof magnetic seal, and sized perfectly for juveniles through adults.
Glass Terrariums
Small glass terrariums like the Exo Terra Nano or similar 8x8x12 inch enclosures work well for larger species like Phidippus regius or Hyllus diardi. Glass provides excellent clarity and weight stability but may require modification to improve ventilation. Ensure the lid is secure — jumping spiders are expert escape artists and can squeeze through surprisingly small gaps. Glass terrariums also work beautifully for bioactive setups with live plants.
DIY Container Enclosures
Creative keepers often repurpose containers like large candy jars, apothecary jars, or cylindrical containers into attractive jumping spider enclosures. The key requirements are adequate ventilation (drill or melt holes in the lid), a secure closure, and enough vertical space. If you go the DIY route, make sure to smooth any rough edges from drilling to prevent injury to your spider.
Jumping Spider Enclosure Size Guide
The ideal jumping spider enclosure size depends on the spider’s life stage and species. Here are recommended minimum dimensions:
Spiderlings (1st–3rd instar) do best in small containers like 16–32oz deli cups. The compact space helps them locate prey and maintains humidity more easily. Juveniles (4th–6th instar) should move to enclosures around 3x3x5 inches to 4x4x6 inches. Adults of common species like P. audax and P. regius thrive in 4x4x7 to 5x5x8 inch enclosures. Large exotic species like Hyllus diardi benefit from 6x6x10 inch or larger setups.
Our pick
the EctoTherm enclosure — front-opening, so you’re not reaching down over a jumpy spider
The most important dimension is height. Jumping spiders are arboreal — they naturally climb upward and build their silk retreats at the highest available point. A tall jumping spider enclosure with moderate floor space is always better than a wide, shallow one.
Ventilation: The Most Critical Factor
Proper ventilation is arguably the single most important feature of any jumping spider enclosure. Stagnant air leads to mold growth, bacterial buildup, and respiratory problems that can quickly kill your spider. The ideal setup uses cross-ventilation — mesh or holes on two opposite sides of the enclosure that allow air to flow through naturally.
Top ventilation alone is often insufficient because hot air rises and exits while fresh air has no entry point. Cross-ventilation ensures constant air exchange without creating excessive drafts. Many purpose-built jumping spider enclosures feature mesh panels on both the top and one side, which provides excellent airflow. If your enclosure only has top ventilation, consider adding small ventilation holes near the bottom of one side.
How to Set Up a Jumping Spider Enclosure
Substrate
The Beginner Jumping Spider Kit
If you’re setting up your first spider, this is the whole list. Nothing fancy, nothing you’ll outgrow in a month.
- EctoTherm jumping spider enclosure — front-opening, escape-proof, and sized right for an adult
- Magnetic hanging water dispenser — the one thing most beginners skip, and the one they regret skipping
- Exo Terra mini mister — a light misting beats a water bowl your spider can drown in
A thin layer of substrate covers the enclosure floor and helps maintain humidity. Coconut fiber (coco coir) is the most popular choice — it’s affordable, holds moisture well, retains minimal odor, and looks natural. Spread a half-inch to one-inch layer across the bottom. Sphagnum moss placed on top of the coco coir adds humidity retention and visual appeal. Avoid substrates that mold easily like untreated soil or wood shavings.
Décor and Climbing Structures
Jumping spiders need vertical climbing surfaces and anchor points for their silk. Cork bark pieces, small sticks or twigs, artificial plants, and silk leaves create a three-dimensional environment that encourages natural behavior. Position décor so it creates pathways from the bottom to the top of the enclosure. Your spider will use these structures for hunting perches, molting sites, and web anchor points.
Live plants like pothos cuttings, small ferns, or moss add beauty and help regulate humidity in your jumping spider enclosure. For ideas on suitable plants, check our guide on best terrarium plants for bioactive setups.
Our pick
a handful of cork bark — gives them anchor points for a proper hammock web
Water and Humidity
Jumping spiders don’t drink from water dishes — they drink water droplets from surfaces. Lightly mist one side of the enclosure every 1–2 days, creating small droplets on the glass or décor. Your spider will drink from these droplets when thirsty. Avoid over-misting — the enclosure should dry out between misting sessions. A dedicated mist bottle with a fine nozzle like the Exo Terra Mini Mister produces a gentle spray that won’t startle or injure small spiders. Most jumping spider species do well at 50–60% humidity, though tropical species may prefer slightly higher levels.
Lighting
Jumping spiders are diurnal (active during the day) and benefit from a natural light cycle. Ambient room lighting near a window (but not direct sunlight, which can overheat the enclosure) is usually sufficient. If your room is dark, a small LED desk lamp on a timer providing 10–12 hours of light helps maintain a healthy day/night cycle. Good lighting also makes it easier to observe your spider’s fascinating hunting behavior.
Temperature
Most pet jumping spiders thrive at normal room temperature — 72°F to 82°F (22°C–28°C). Avoid placing the enclosure near heat sources, in direct sunlight, or near drafty windows. Temperature consistency matters more than hitting a specific number. If your home drops below 68°F regularly, a small heat mat on a thermostat placed on one side of the enclosure can provide supplemental warmth.
Jumping Spider Enclosure Maintenance
Keeping a jumping spider enclosure clean is simple and takes just minutes per week. Remove uneaten prey insects within 24 hours — leftover crickets can stress or even injure a molting spider. Spot-clean any visible waste or boluses (the dried remnants of eaten prey). Replace substrate fully every 4–6 weeks, or sooner if you notice mold or odor.
Clean the enclosure walls with a damp cloth to remove water spots and silk residue that obscure your view. Never use chemical cleaners, soaps, or sprays inside or near the enclosure — even trace amounts of these substances can be lethal to spiders. Plain warm water is all you need for cleaning.
Common Jumping Spider Enclosure Mistakes
The most common mistakes keepers make with their jumping spider enclosure include: using enclosures that are too large for spiderlings (making it impossible for them to find food), inadequate ventilation leading to mold, placing the enclosure in direct sunlight causing overheating, using substrates or décor treated with pesticides or chemicals, leaving uneaten feeder insects in the enclosure, and over-misting to the point where standing water accumulates on the bottom.
Another frequent mistake is poor lid security. Jumping spiders can squeeze through gaps as small as 1–2mm and are persistent escape artists. Always ensure your enclosure’s lid fits snugly with no gaps. Magnetic closures, clip-on lids, and screw-top containers are the most secure options.
Where to Buy Jumping Spider Enclosures
Ready to order? The EctoTherm Small is our top recommendation for first-time keepers. When your spider reaches adulthood, the EctoTherm Jumping Spider Enclosure gives them the vertical space they need.
The Beginner Jumping Spider Kit
If you’re setting up your first spider, this is the whole list. Nothing fancy, nothing you’ll outgrow in a month.
- EctoTherm jumping spider enclosure — front-opening, escape-proof, and sized right for an adult
- Magnetic hanging water dispenser — the one thing most beginners skip, and the one they regret skipping
- Exo Terra mini mister — a light misting beats a water bowl your spider can drown in
Specialty jumping spider enclosures are available from online retailers like Josh’s Frogs, Amazon, Etsy (where small businesses sell beautiful custom enclosures), and dedicated reptile/invertebrate supply shops. Many breeders who sell jumping spiders for sale also offer enclosure bundles that include everything you need in one package — enclosure, substrate, décor, and sometimes even feeder insects.
Final Thoughts
Setting up the right jumping spider enclosure doesn’t need to be complicated or expensive. Focus on the essentials — adequate height, good ventilation, simple décor for climbing, and consistent misting — and your spider will thrive. As you gain experience, you can upgrade to more elaborate setups with live plants and bioactive substrates. For complete care information including diet and lifespan, explore our jumping spider care hub, learn what to feed your spider, or check out how long jumping spiders live.